1. What is the Tool Used for
PromoNavi’s Keyword Planner is a helpful tool for PPC managers to simplify and automate the new Google Ads campaigns creation. It’s a two-in-one tool that combines a keyword research service with a campaign builder.
All you need to do is to enter a few basic keywords and the platform will generate a massive relevant keyword list. Further, you can filter this list, pick the best keywords, select match types, get negative keywords, and send campaigns to your Google Ads account directly from your PromoNavi dashboard.
The campaign builder automatically creates the right campaign structure with ad groups containing keywords with different match types. Also, the tool generates negative keyword lists for each ad group. The platform is flexible: you can choose any existing ad group, delete keywords, or delete negative keywords.
2. Short-List of Key Features
Keyword planner
- A massive keyword ideas list based on basic keywords
- Useful data for each keyword: Search Volume, CPC, Difficulty
- Keyword search history for the last 12 months
- Keywords collecting is available for 119 countries
- Upload keywords to XLS or to clipboard
- Filter keyword list by various attributes
Campaign builder
- Automated SKAG builder
- Campaign creator
- Keyword wrapping for any match type
- Adding keywords to the new or existing ad groups
- Cross-group negative keywords generator
- Delete keywords or move to another ad group
- Publish all changes to Google Ads directly from the PromoNavi dashboard (or export to CSV)
3. How to Find New Keywords
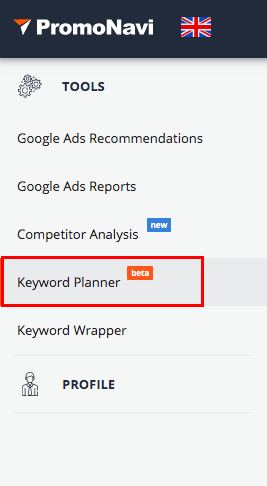
Select Keyword Planner in the toolbar on the left.
Select the country in which you’re planning to run the campaign, and paste keywords that describe your business/products/services into the Enter new keyword… field.

Press the SEARCH button.

The tool will generate a table with relevant keywords.
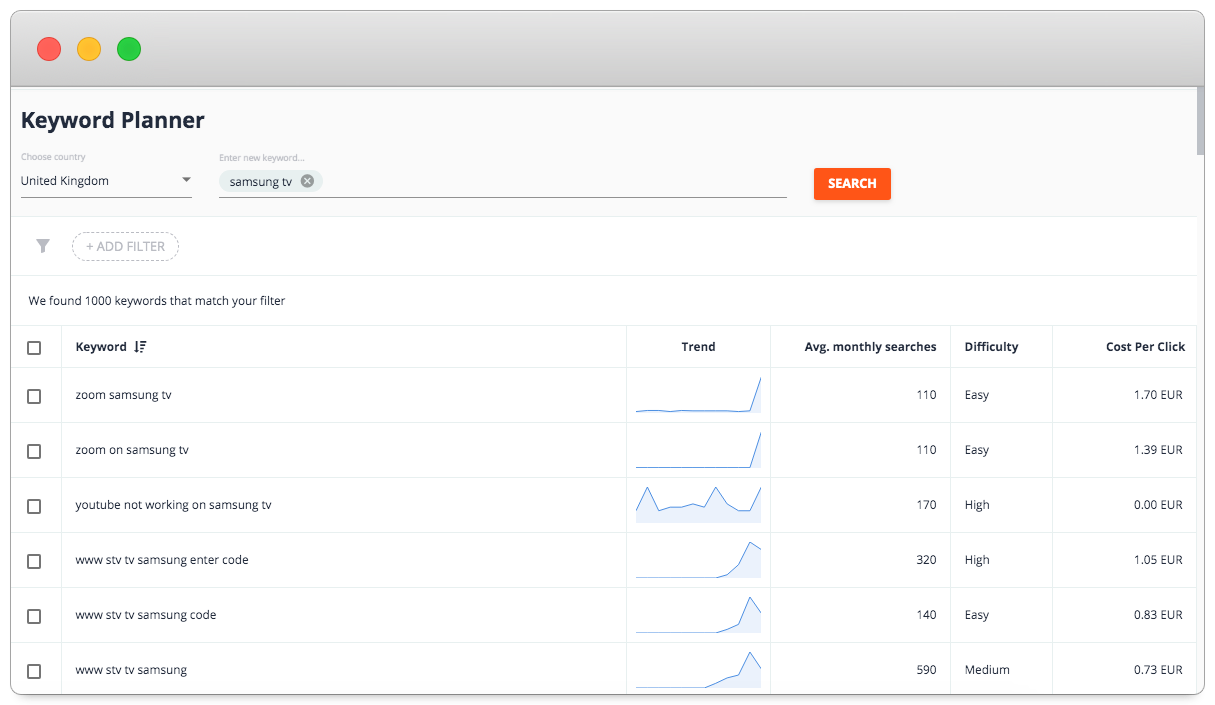
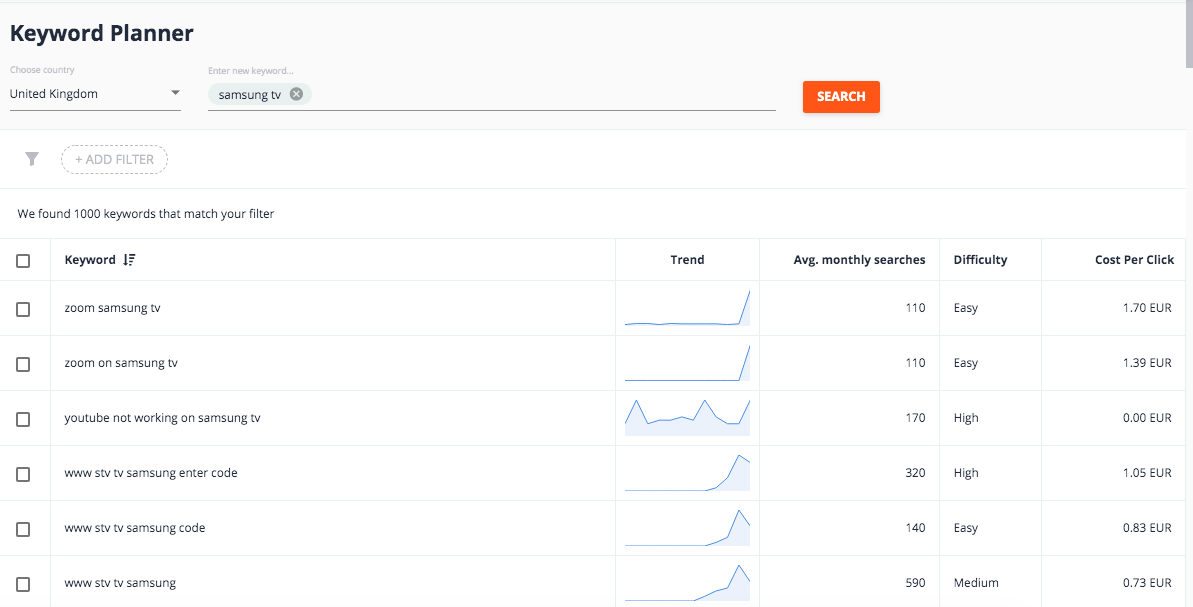
You can see a trend chart and three metrics for each keyword: Average monthly searches, Difficulty, and CPC. Keyword sorting is available for each of these metrics.
The Trend column displays the average monthly searches variation for a specific keyword during the last 12 months.
When you hover over the chart you will see a detailed chart with average monthly searches for the last 12 months. You can use this data to see how popular your keywords are during each month of the year.

The Average monthly searches column shows the average number of searches for this keyword during the range of the month.
The Difficulty level is determined by the number of advertisers bidding on each keyword relative to all keywords across Google.
Cost per Click is the average price you will pay per click on an ad triggered by a given keyword.
At the bottom of the page, you can choose how many keyword rows per page to be displayed (50, 100, or 500,) and go to the next/last page.

How to use the filter
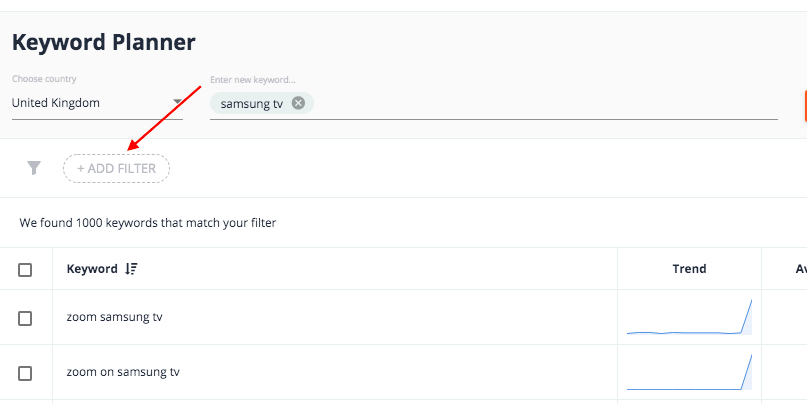
You can filter the keyword list by one or more attributes. Click the + ADD FILTER button, and a list of available filters appears.
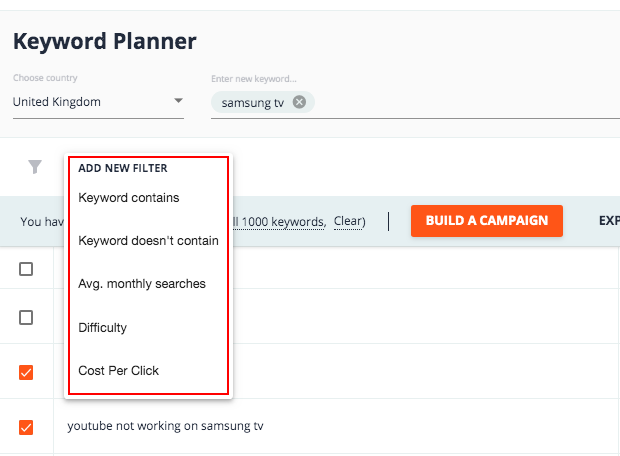
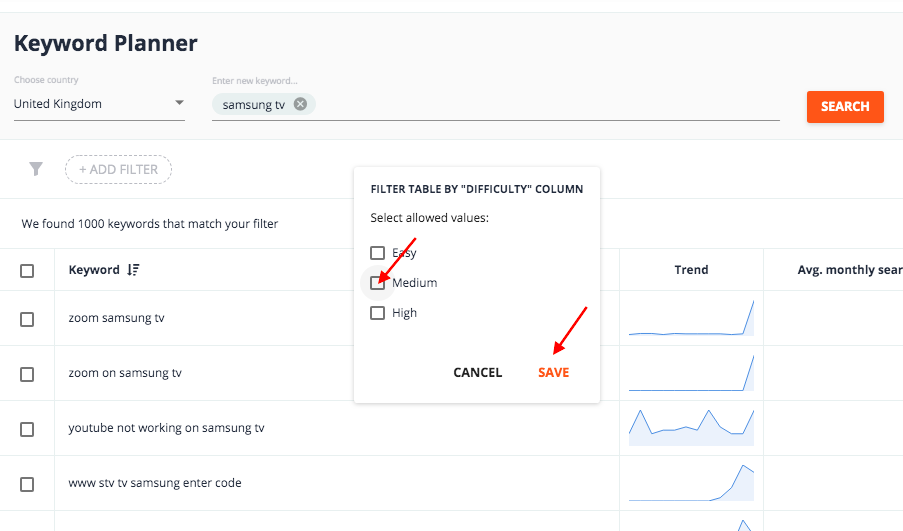
For example, to filter out only medium difficulty keywords, choose the Difficulty filter option, select Medium, and click SAVE.
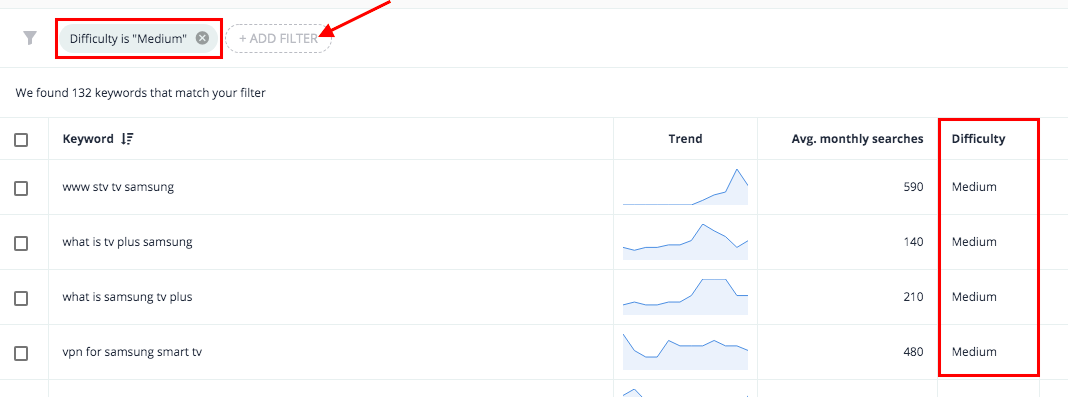
Now your keyword list contains only medium difficulty keywords, and you can add one more or several filters if needed.
To exclude keyword ideas with specific words, use filters for the Keyword column. Add words you want to eliminate, one per line. To add a new word, click + ADD ONE MORE RULE. After you press SAVE, the tool will show only keywords that do not contain any of the words you’ve entered.
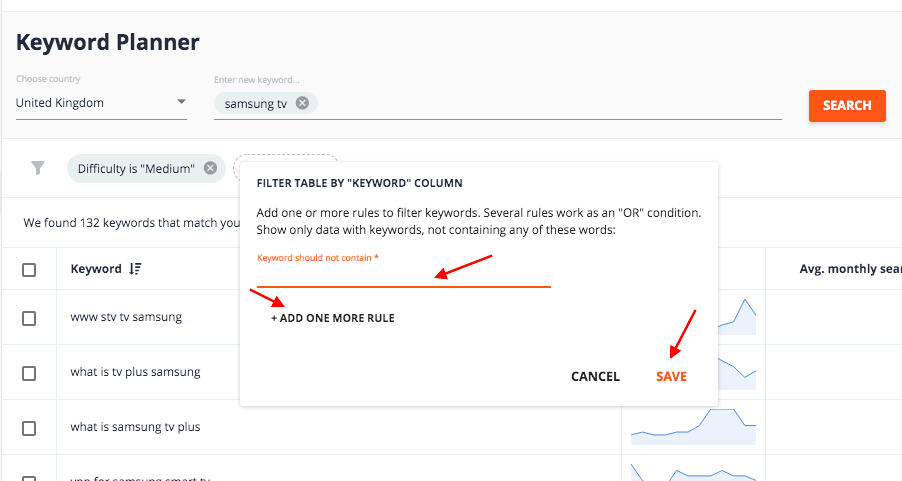
If you want to select keywords with a specified search volume, choose the Avg. monthly searches filter. Select the greater than or the less than option, and enter a number. Click SAVE to see the changes.
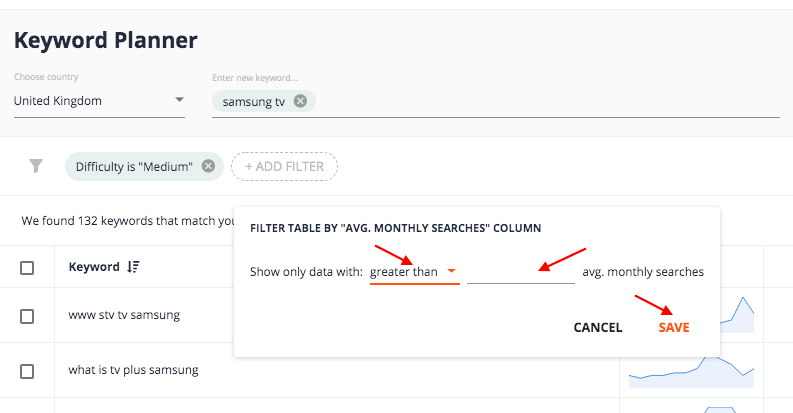
You can do the same for the CPC.
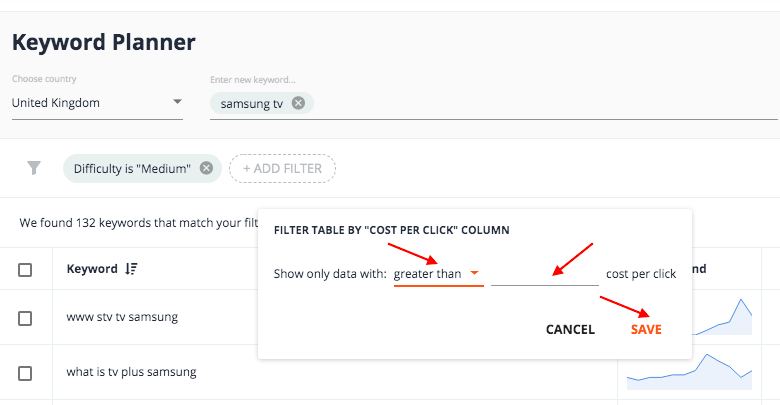
You can apply as many filters as you need at the same time.
How to select keywords
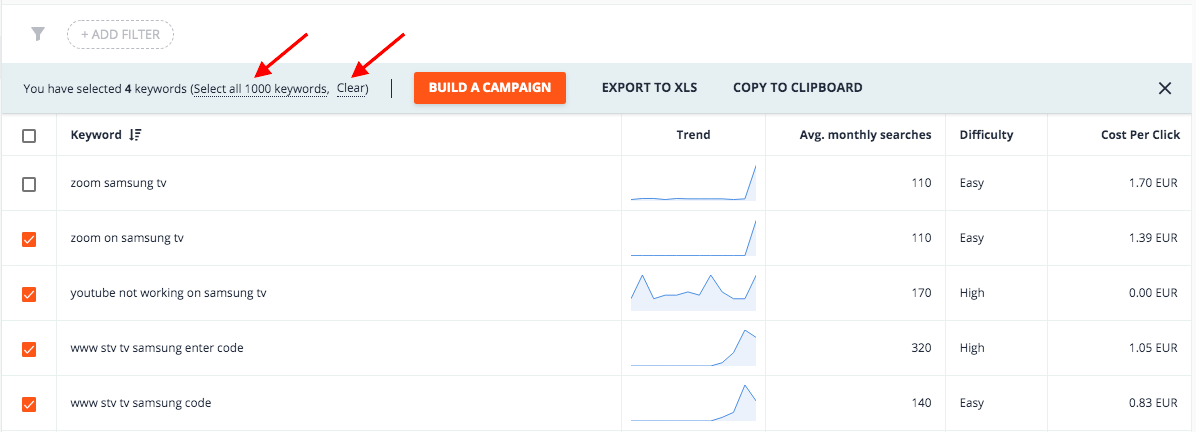
To select a single keyword, tick the checkbox on his left.
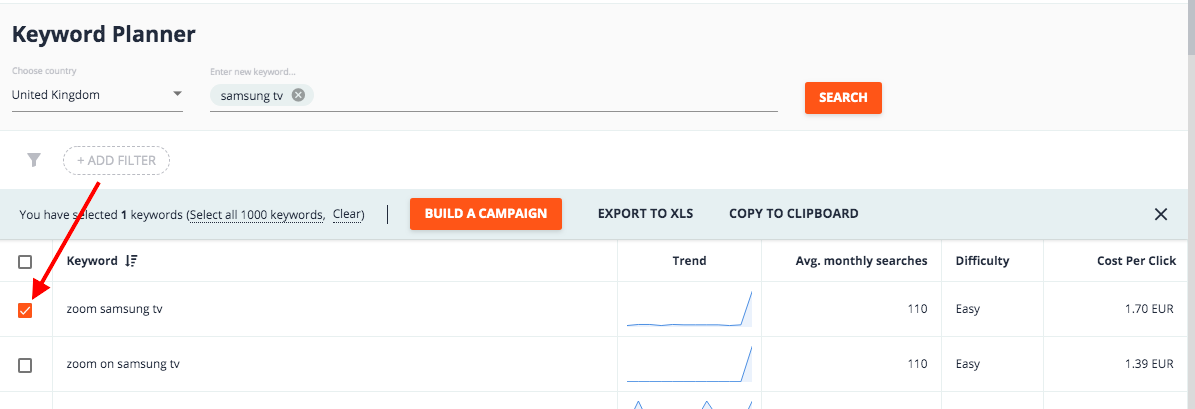
To select all keywords on the page, tick the checkbox on the left to the Keyword column header.

Also, you can select all the collected keywords, as well as clear the selection.
How to export keywords
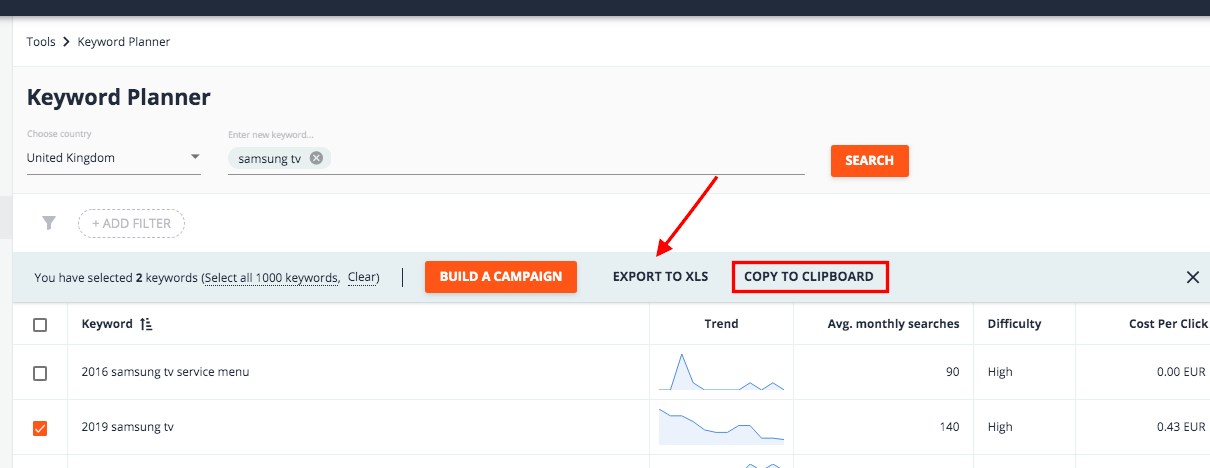
There are two ways to export keywords: Export to XLS and Copy to clipboard. Tick the keywords you want to export, and choose the exporting option.
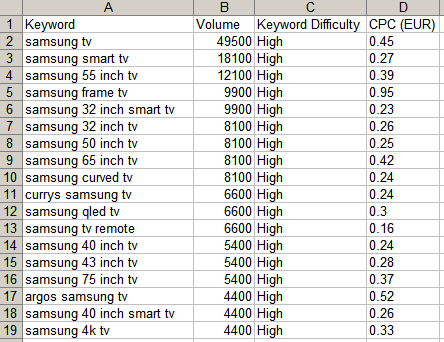
If you export keywords to XLS, the file will be downloaded automatically. The table contains four columns: Keywords, Volume, Keyword Difficulty, and CPC.
If you use copying keywords to the clipboard, then you should open the spreadsheet and paste the data manually.
Note! The tool exports only ticked keywords. So, use the available filters and checkmark options to select relevant keywords.
4. How to Add Keywords to Your Google Ads Campaign
To use this feature, make sure your Google Ads account is linked to PromoNavi.
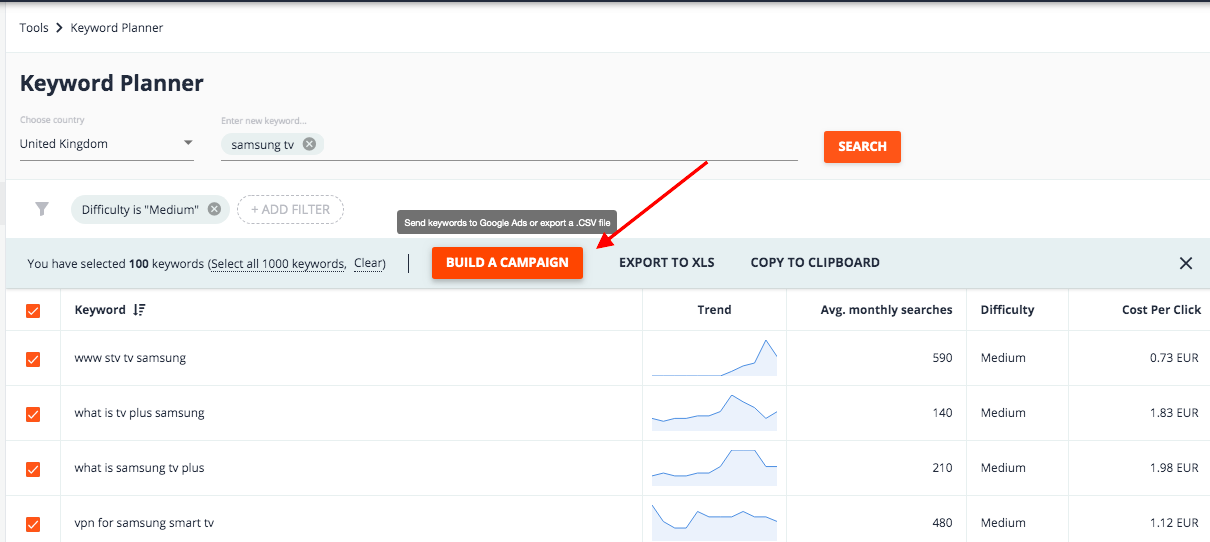
Select keywords you want to add to the campaign (use filters or tick them,) and click the BUILD A CAMPAIGN button on the top.
Choose your Google Ads account (you can search it by Name or CID,) and an existing campaign from the list, or create a new one. For a new campaign, enter a campaign name and set a budget. Click SAVE.
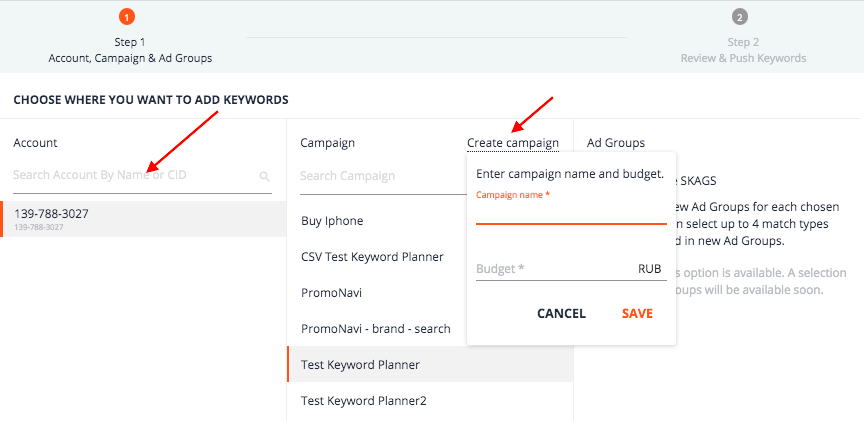
The platform will generate SKAGs (Single Keyword Ad Groups) for each chosen keyword.
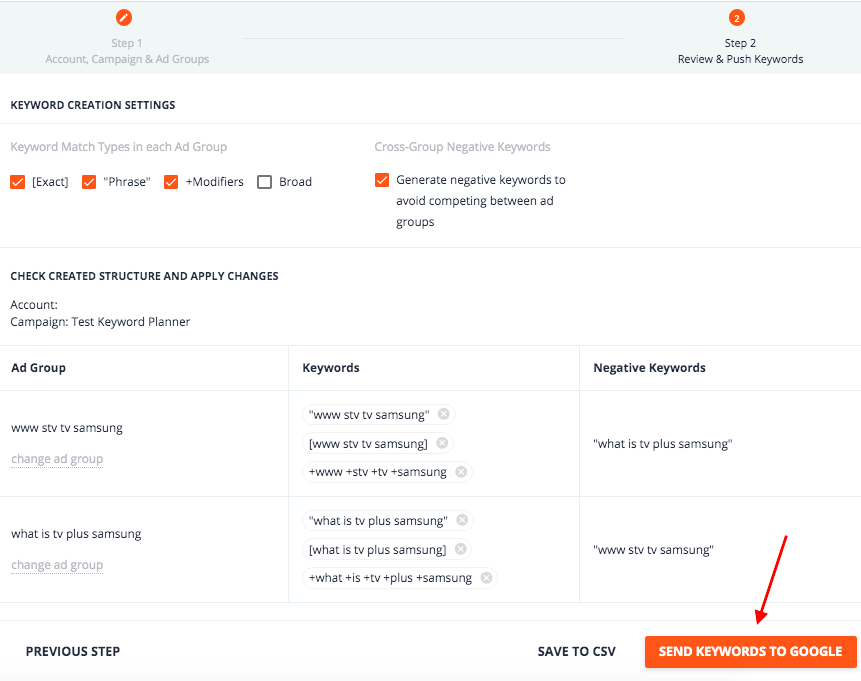
In the Keyword Creation settings, you can select up to 4 match types for each keyword in new ad groups, and enable or disable cross-group negative keywords list generation.
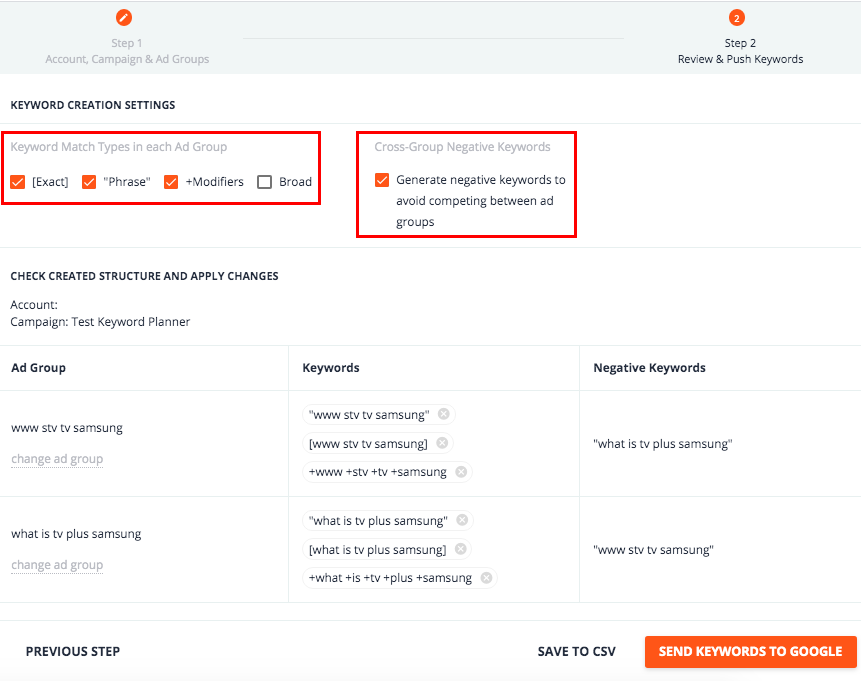
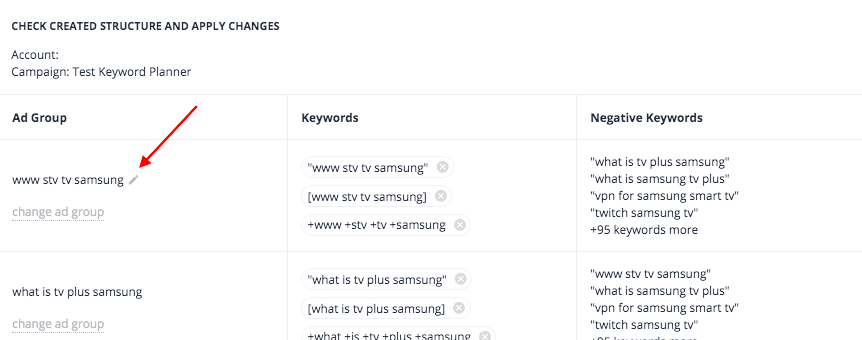
Check the generated campaign structure, and apply changes if needed.
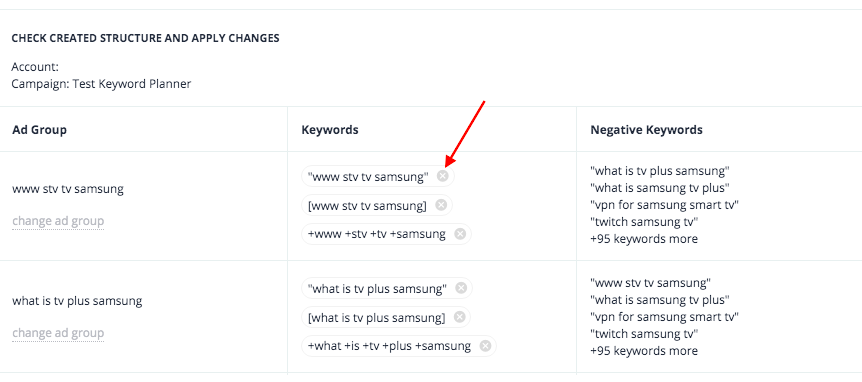
To delete keywords, click on the “X” icon.
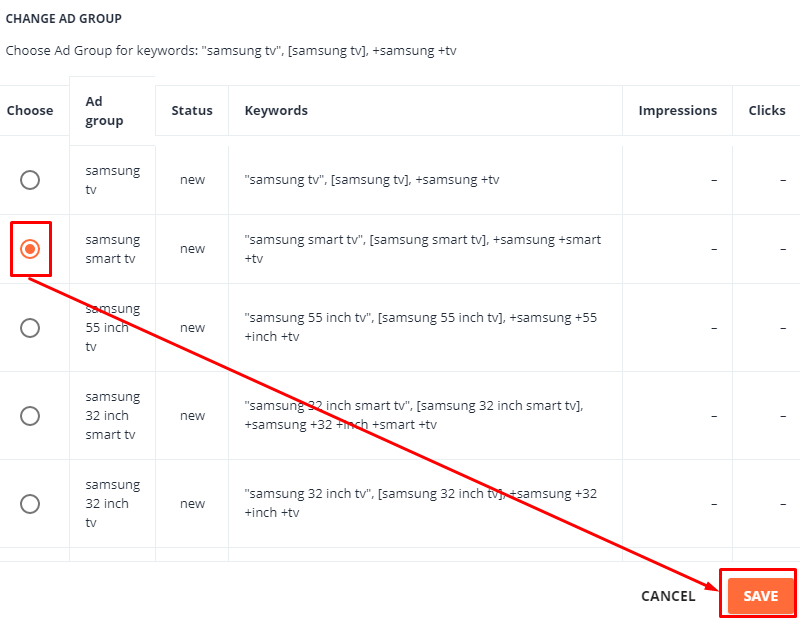
Also, you can move keywords to another ad group. Click the change ad group link below the ad group title from which you want to move keywords. The next step is to choose the targeted ad group and press SAVE. The keywords will migrate to the targeted ad group.

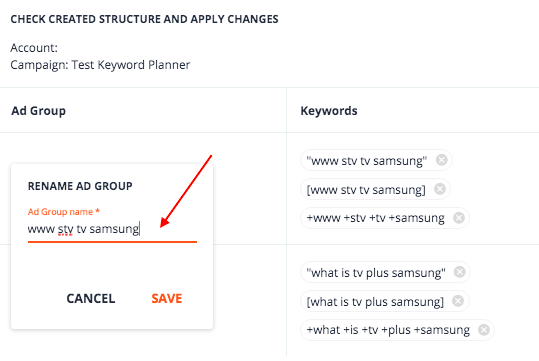
To rename an ad group, hover over its name and click the pencil icon.
Enter a new name, and click SAVE.
When everything is ready, send the keyword groups directly to your Google Ads campaign. To do this, press the SEND KEYWORDS TO GOOGLE button at the bottom of the page.
Also, you can export the ad groups and upload them to your campaign through Google Ads Editor.

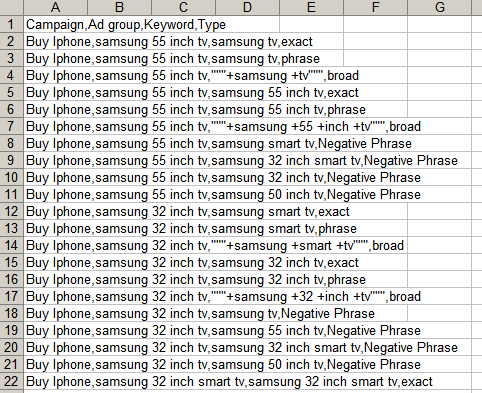
Here is the report sample:
